

 EN
EN
 AR
AR CS
CS DA
DA NL
NL FI
FI FR
FR DE
DE EL
EL IT
IT JA
JA KO
KO NO
NO PL
PL PT
PT RO
RO RU
RU ES
ES SV
SV TL
TL IW
IW ID
ID LV
LV SR
SR SK
SK VI
VI HU
HU MT
MT TH
TH TR
TR FA
FA MS
MS GA
GA CY
CY IS
IS KA
KA UR
UR LA
LA TA
TA MY
MY
A seal kit replacement that fails within the first 50 percussion hours is almost never a parts quality problem. It's an installation error—usually one of three: the bore wasn't flushed before new seals were fitted, a dynamic seal was twisted during installation, or the backup ring was installed with the wrong orientation on an asymmetric profile. All three are invisible once the drifter is reassembled, and all three produce early seal failure that gets blamed on the kit.
This tutorial covers the standard procedure for percussion seal kit replacement on hydraulic rock drills. The sequence applies to most major drifter models with minor variations. Where specific steps differ between split-body and integrated designs, that's noted. The goal isn't to replace the model-specific service manual—it's to cover the steps that service manuals often treat as assumed knowledge but that cause most field failures.
Before Opening the Drifter: What to Prepare
Hydraulic pressure must be fully relieved before breaking any connections. Cycle the percussion circuit through its full range of motion after shutting down the carrier, then open the drain port briefly to confirm zero pressure. A drifter that opens under residual pressure can eject components—the high-pressure accumulator stores enough energy to cause injury if the front end is removed while the percussion circuit is still charged.
Set the work area. Lay a clean mat or plastic sheet—the precision clearances inside a percussion bore are measured in microns, and a single grain of grit on the new seal lip will initiate abrasion that shortens seal life by 30–50%. Clean rags, lint-free where possible, and fresh hydraulic oil for bore flushing and seal lubrication should be within reach before disassembly starts. Never use compressed air to clean the bore interior; it drives particles into the piston clearance rather than removing them.
Disassembly: The Order That Prevents Damage
Remove the flushing box assembly first if it's accessible without disturbing the percussion module. The flushing box seals wear at a different rate from the percussion seals, and inspecting them separately allows targeted replacement rather than automatic combined overhaul. Mark the orientation of each component as it comes out—some seals, guide bushings, and shims are asymmetric and must reinstall in the same position.
When extracting the piston, support it fully as it clears the bore. A piston dropped on concrete from even 30 cm can produce a surface nick that's invisible until it scores the new seal on the first power stroke. Place it on a clean mat immediately. Inspect the piston bore surface before fitting new seals: any scoring, pitting, or corrosion groove wider than 0.2 mm will damage the new seal at that point under pressure—bore regrind or housing replacement is the correct repair if bore damage is present. Installing a new seal kit into a damaged bore is guaranteed waste.
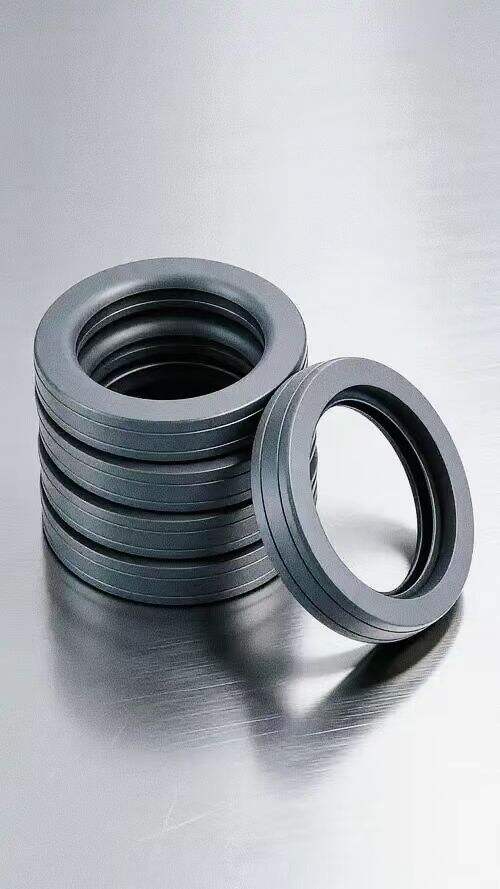
Seal Identification and Orientation Check
|
Seal Position |
Type |
Orientation Check |
Common Error |
|
Percussion piston |
Dynamic U-cup or lip seal |
Open side faces high-pressure chamber |
Reversed lip direction—fails immediately under load |
|
Guide bushing / sleeve |
Static or low-dynamic |
Flat face matches groove shoulder |
Partial seating leaves gap; leaks at low pressure |
|
Flushing box |
Dynamic lip seal |
Lip faces incoming flushing water |
Twisted during installation—creates spiral wear path |
|
Accumulator port O-ring |
Static O-ring |
No orientation required; check size match |
Wrong bore size—over-compression causes extrusion |
|
Backup ring |
PTFE semi-rigid |
Concave side faces elastomer seal |
Reversed—provides no extrusion support under pressure |
|
Wiper / dust seal |
Dynamic lip seal |
Lip faces outward toward atmosphere |
Installed inward—contaminants enter rather than excluded |
The backup ring orientation error is worth highlighting specifically. In a U-cup or lip seal assembly running above 160 bar, the backup ring sits on the low-pressure side of the seal to prevent extrusion of the elastomer into the clearance gap between bore and piston. If the backup ring is installed with its concave face away from the elastomer—an easy mistake to make with an ambiguous part that looks nearly symmetrical—it provides no extrusion resistance. The seal extrudes into the clearance gap within the first few hours of high-pressure operation and fails in a way that looks exactly like material defect.
Bore Preparation Before Fitting New Seals
Flush the percussion bore with clean hydraulic oil—not compressed air, not a dry rag, not solvent. Hydraulic oil is compatible with the seal compounds, removes fine metal particles from the previous wear cycle, and provides lubrication for the initial start-up before the system is fully pressurized. Two or three passes with a lint-free cloth soaked in clean oil, followed by a visual inspection under good lighting, is sufficient preparation for a bore in good condition.
Coat the new seals with the same hydraulic oil before installation. Dry elastomer seals can develop micro-tears on the lip edge during installation if the bore entry chamfer isn't perfectly smooth. Lubricated seals roll over the entry chamfer cleanly. The oil film on the seal lip also provides critical boundary lubrication during the first few seconds of operation before the full hydraulic film is established.
Installation: The Steps Most Often Rushed
Dynamic seals must be installed without twisting. Hold the seal in a true axial orientation as it enters the groove—any angular misalignment during insertion rotates the lip around the bore circumference rather than seating it evenly. A seal that's been rotated 10–15 degrees during installation will have a helical wear pattern on the lip within the first 100 operating hours. It won't fail immediately, which is why this error goes unrecognized until the seal comes out at the next service.
Torque the percussion module end bolts to specification in an alternating cross pattern. Uneven bolt torque distorts the bore-to-bore alignment between modules, which produces offset loading on the piston guide seals and accelerates asymmetric wear. The module faces need flat, even contact across their full surface to maintain the bore coaxiality that the piston clearance tolerance depends on.
First Start-Up After Replacement
Don't immediately run the drifter at full percussion pressure after a seal replacement. Start the carrier, allow the hydraulic oil to circulate and reach operating temperature, then engage percussion at approximately 50% of rated pressure for the first 5–10 minutes. This allows the new seals to seat uniformly under moderate load before full pressure cycling begins. Check the return oil for contamination—a milky appearance indicates water intrusion through the flushing box, which means the flushing seals need reinspection before continuing.
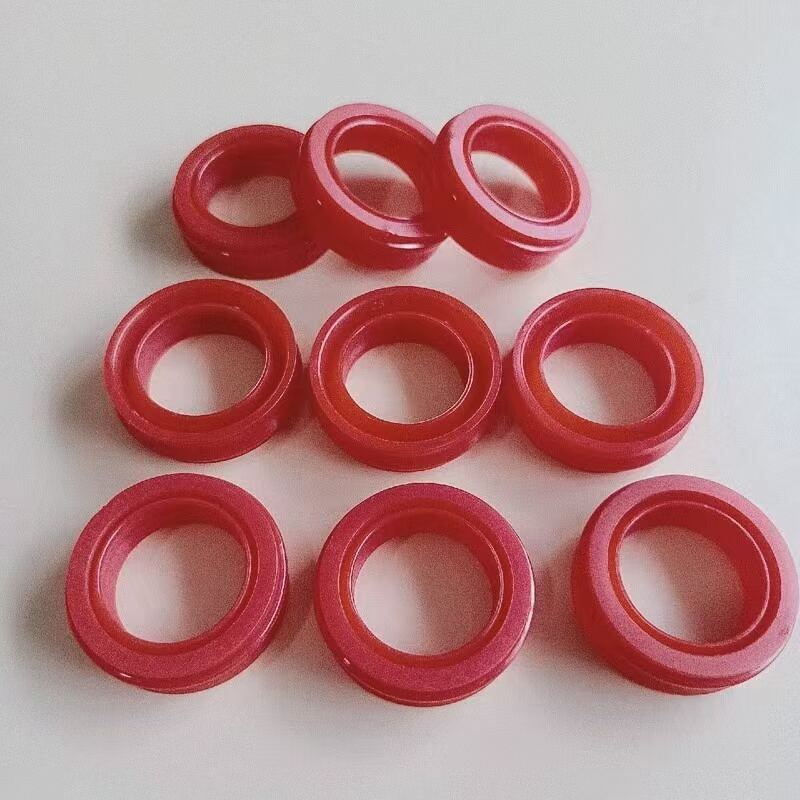
HOVOO supplies rock drill seal kits with installation instructions for each model, with PU and HNBR compound options matched to drifter application and operating environment. All components in the kit are dimensioned to OEM specification and tested under cyclic load prior to shipment. Model-specific references at hovooseal.com.